| |
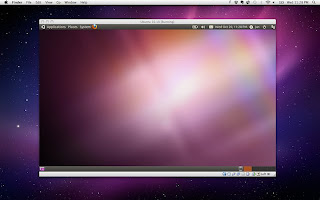
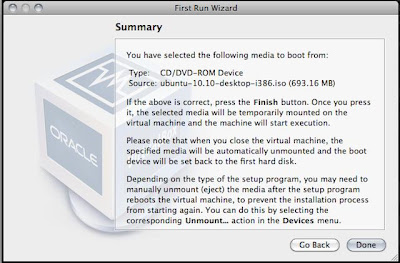
| Installing Ubuntu 10.10 (Maverick Meerkat) on Mac OS X Using VirtualBox Posted: 20 Oct 2010 08:16 AM PDT As some of you may know, I've upgraded or should I say tried upgrading my Ubuntu 10.04 (Lucid Lynx) desktop to 10.10 (Maverick Meerkat). Sad to say, the result was a disaster. Although the whole installation process was successful, I ended up having an unbootable system. Since I'm not yet in the mood to fix it, I decided to just try Ubuntu 10.10 by installing it on Mac OS X as guest OS using my favorite free virtualization software VirtualBox.  To those of you who would also like to install Ubuntu 10.10 (Maverick Meerkat) on Mac OS X via VirtualBox, here is a step-by-step guide (with screenshots) on how to do it: 1. Download the latest version of VirtualBox for OS X from HERE, and then install it. 2. Run the VirtualBox application and create a new virtual machine.  3. Allocate RAM to your virtual machine. The recommended amount of memory is 512MB but I decided to portion out 1024MB since my total RAM is 4GB.  4. Create a new virtual hard disk for Ubuntu.  5. Select the type of virtual hard disk. I recommend you use dynamically expanding storage for a more flexible disk space.  6. Decide on the size of disk space that will be allotted to your virtual machine.  7. The virtual disk will be created once you click on the "Done" button.  8. Turn on the virtual machine by clicking on the "Start" icon.  9. The first run wizard will appear to help you install the OS, in this case Ubuntu 10.10.  10. Select the media that contains the Ubuntu 10.10 ISO installer.  11. Since the installer was saved on my hard drive, I added it using the virtual media manager.  12. Once you are done, the Ubuntu 10.10 installation process will follow. If you are already familiar with Ubuntu, just install it like you normally would.  For those of you who have not used Ubuntu before, watch out for the Ubuntu 10.10 installation walkthrough on my next post. I will also give a screenshots tour and share with you my first impressions of using Maverick Meerkat. |
| How to Download Rapidshare and Megaupload files from the Linux Terminal Posted: 19 Oct 2010 11:12 PM PDT  How to Download Rapidshare and Megaupload files from the Linux Terminal: Not long ago, we've shown you how to download torrent files from the Linux terminal. Today, I will share with you a way to quickly and efficiently download files from file-sharing websites such as Rapidshare and Megaupload also from the command line. To download any Rapidshare and Megaupload file from the Linux terminal, you will need to install an application called 'plowshare'. You can get it from HERE. Before using plowshare, you should install these packages first: curl recode imagemagick tesseract-ocr rhino aview PerlMagick Since I'm using Ubuntu, I downloaded and installed those packages using this one-liner: $ sudo apt-get install curl recode imagemagick tesseract-ocr-eng rhino aview perlmagick Now that everything is set, you could start downloading Rapidshare and Megaupload files using the Linux terminal. Here are some usage examples: Downloading a file from Rapidshare: $ plowdown http://www.rapidshare.com/files/12345678/Elephants_Dream.rar Downloading a file from Megaupload (with free membership account): $ plowdown -a myusername:mypassword http://www.megaupload.com/?d=12345678 Downloading a password-protected file from Megaupload: $ plowdown -p somepassword http://www.megaupload.com/?d=swf1g53x For other usage examples, you may go HERE. It is worth noting that plowshare also supports other file-sharing services such as 2Shared, 4Shared, ZShare, Badongo, Divshare.com, Depositfiles, Mediafire, Netload.in, Storage.to, Uploaded.to, Uploading.com, Sendspace, and Usershare. I always use the Linux terminal when downloading files since I find it fast and utilizes less system resources, so I encourage you to try it. |
| You are subscribed to email updates from TechSource To stop receiving these emails, you may unsubscribe now. | Email delivery powered by Google |
| Google Inc., 20 West Kinzie, Chicago IL USA 60610 | |


No comments:
Post a Comment