| |
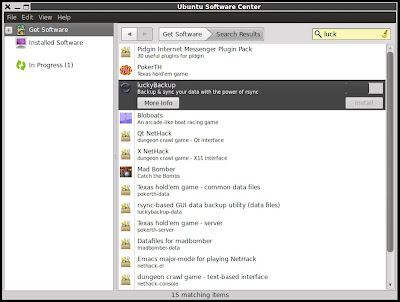
| Posted: 17 Feb 2011 03:27 PM PST  There are a large variety of backup tools for Linux available. From extremely complex to smooth and simple, Linux users have no shortage of options to backup their data. luckyBackup is one such tool. With it you can backup to a local machine, or to a remote one. With its user-friendly graphical user interface, or GUI, all of the features expected in a backup tool are available, and easy to configure and use. There are a large variety of backup tools for Linux available. From extremely complex to smooth and simple, Linux users have no shortage of options to backup their data. luckyBackup is one such tool. With it you can backup to a local machine, or to a remote one. With its user-friendly graphical user interface, or GUI, all of the features expected in a backup tool are available, and easy to configure and use. If you think that luckyBackup is only designed for end-users, you may be surprised. It is an open source program that is actually quite worthy of managing business backups as well. Installation Installation is easy. If luck is on your side, luckyBackup will be easily found in your distribution repositories. If so, all you will need to do is fire up the package management tool and run a search for luckybackup. However, if luck isn't on your side today, you will need to head to the luckyBackup download page and grab a copy of the binary for distribution on your machine. Once the file has been downloaded it should be as simple as allowing the browser to auto-detect and allow your preferred installation tool to install the package. If you are using Ubuntu, you can also install it from the command line by using the command: $ sudo apt-get install luckybackup Using Lucky Backup to Create Remote Backup Creating a remote backup for network transportation using SSH is as easy as following a few simple instructions. To create a backup with user intervention it you will want to first set up a password-less secure shell communication configuration. You will need to open the terminal window and input the command luckybackup. This will then open the graphical user interface for the application. This is where you will need to plan to add any backups you will create. To begin, click the Add button. In the new window that appears, you will then need to fill in all of the required pieces of information. The information required here will include the Name you want to give your backup file. -The type including the options for Full or Incremental. Also included here is the Source, which is the item you want to backup, and lastly, the Destination, or the directory where you will store the completed backup. Under the Remote tab be sure to include the following: 1. Check the box next to Use Remote Host. 2. Check the box next to Destination. 3. Under User, enter the user name on the remote machine. 4. Host requires the IP address of the remote machine. 5. Check the SSH box. Once you have set all of the above configuration options click Okay to save the settings. You will now click Start to initiate the backup process. If all of the settings were configured correctly you will now be informed of this and the terminal window where you initiated luckyBackup from in the first place will now prompt you for the remote user password. Enter the password in the prompt box of the terminal window and hit enter. If you have set up your password-less secure shell, you will not be continually be prompted for this command, this will also allow you to select scheduled backups without needing to be there to enter the password each time. Helpful and Easy Knowledge This was a very simple process. Some Linux users tend to become wary when programs or applications require a lot of processes and long strings of commands of which they may be unsure of. Using programs like luckyBackup can take the stress out of something as vital and necessary as data backup. |
| You are subscribed to email updates from TechSource To stop receiving these emails, you may unsubscribe now. | Email delivery powered by Google |
| Google Inc., 20 West Kinzie, Chicago IL USA 60610 | |


No comments:
Post a Comment